
Friday, 3 May 2013
Project Evaluation
It is unbelievable that this is the last project
for my first year of university life, and I have completed the project! At
first, I was not quite sure which urban legend I wanted do for this project,
until I came up with the vampire idea for "The Babysitter
and The Man Upstairs" urban legend. After watching several reference films based on the story
of The Babysitter and The Man Upstairs, I feel my vampire idea really stands
out as it has not been discovered before!
The most enjoyable part of this whole
project was doing the researching for different versions of vampires that have
been made before. I am the person who's really obsessed with the vampire thing,
so it was a pleasure for me doing all these work! However, I have noticed that
because I was putting all my attention into the vampire character, which made
me left the second character (The babysitter) behind. This might be the problem
which I need to warn myself for next time. Although I did not do much
researches on the second character, I still happy with the final outcome. The
whole make-up application almost took me 3 hours to complete it. As I was
trying to achieve the most realistic vampire bite mark, and putting on
individual eyelashes also took quite a long time. The final design of the
babysitter is quite simple, but it does not mean I put less effort while doing
the look.
Overall, I think I have done a pretty good
job on this urban legend project, and I think I have moved one more step closer
to the professional makeup artist.
Thursday, 2 May 2013
Babysitter Final Images


Here you go, my babysitter's final images! The vampire bite mark actually was not that easy to create, as the skin texture of neck is really soft and stretchable which means that it would be much more difficult to smooth down the Plasto onto the skin! I am glad I succeed in the end and it looks so real in the pictures! Also, I think I have done a pretty good job on achieving the perfect complexion, I absolutely love the contour shadow underneath the cheekbones. I love the combination of beauty and gore :P
Wednesday, 1 May 2013
Create Babysitter Final Look

Model: Carina Mensching
Working Process


Step 1: Tie model's hair into a loose low bun. Backcomb the hair to achieve some volume on the top. Then softly pull all hair to the back, tie it with a rubber band. Backcomb the ponytail and take sections of hair surround into a bun. Use some hairspray to keep holding the hairstyle.
Step 2: Use Plasto as the fake skin, shape it into vampire bite wounds. Smooth down the edges of Plasto so it fade into the real skin. Powdered the Plasto afterwards so it won't be sticky anymore.
Step 3: Use Real Techniques expert face brush and cream foundation palette by Screen Face, apply a smooth base. Conceal any blemishes and redness, then lightly powdered the face. Then, use Illamasqua powder blusher in Disobey to contour sides of forehead, underneath the cheekbones and jawlines.
Step 4: Put some lip balm on the lips to prepare for the application afterwards. Apply some light brown eyeshadow on the outer corner of the eyes to define the eye shape using Screen Face eyeshadow palette. Then curl the lashes, apply some mascara and put on individual false eyelashes. Use No.7 lipstick in Grape on the lips. Finish the whole face makeup with L'oreal Paris powder blush in True Rose on the cheeks, blend it nicely into the contour colour.
Step 5: Use some fake gore in the vampire bite wounds, and some fake blood running down the neck.
Friday, 26 April 2013
Vampire Final Images


In the end I decided to let my vampire character has scary red eyes, because I photoshoped his pupils off and it actually looks like children's paper-made mask... Also, I was playing with the lighting and try to get shadows on both sides of face, but as the equipment in the make-up shooting studio is limited so I was not able to achieve the effect. Although I wasn't been able to get the effect I want , I did actually manage to get some shadows on one side of face and I really like the shadow on model's neck! One thing I am extremely proud of myself is the dry complexion I created, I think this really makes my thirsty vampire look complete!
Wednesday, 24 April 2013
Create Vampire Final Look

Model: Nathan
Working Process


Step 1: Clean and moisturized the skin to prepare for the make-up application.
Step 2: As my model's skin tone is not too pale, so I used a foundation colour which is lighter than his skin tone to achieved the dead pale skin effect. Apply the foundation with a sponge and powder the face afterwards.
Step 3: Create the peeling skin effect by using the PVA glue technique, and powder the face again.
Step 4: Contour two sides of forehead and underneath the cheekbone.
Step 5: Filling the eyebrows with dark brown eyeshadow to define the brows.
Step 6: Use gray and black eyeshadow around the eye area, especially the under-eye area to create dark circles.
Step 7: Draw veins underneath the eyes using the colour dark red and purple.
Step 8: Dab some foundation on the lips to make them looks paler. Then apply dark purple red lip colour on the center of the lips, blend well with the foundation afterwards.
Finally, put on the fangs and power the face again to make sure it's completely matt before shooting.
The Finish Look

Tuesday, 23 April 2013
Final Shoot Posing Ideas


Today, I did some simple sketches of how I want my models to be posing when shooting the final images. For the vampire, I would like to ask the model to look slightly up and open his mouth so the fangs can be seen at this angle. I might as well ask the model to turn his face to the side so I can get some shadows on his face. For the babysitter, she will be holding a cross necklace on her hands and posing like she is praying. As she will have beautiful false lashes on her eyes, so I would like to capture the side face in order to get the eyelashes shows up more in the pictures.
Monday, 22 April 2013
Individual Eyelashes Application Practice


Today, I had a little played on applying the individual lashes on myself. I apply the eyelashes in between my natural eyelashes so they hide perfectly! Although you can see some eyelashes glue showing but I will apply a black mascara in the end so it does't matter too much. I think I am going to use longer length individual lashes when doing my final on the model, because I feel the practice is not dramatic enough and perhaps not being able to show up in the pictures.
Sunday, 21 April 2013
Vampire Bite Makeup Effect Experiment

Product used:
Stick glue, spatula, hair pins, foundation, loose powder, supra-colour palette, make-up brushes.


First, I used stick glue and shaped it into a vampire bite wound using spatula. Then wait till the surface of glue is not sticky, apply foundation on top and set it with loose powder. After that I use dark red from the supra-colour palette, apply on the hole. As I don't have any fake blood on hand so I have to use paints, but for the final shooting I will be able to get some fake blood in the studio!
Saturday, 20 April 2013
Babysitter Final Make-up Design

This is my final make-up chart design for the babysitter.
* Perfect skin conplexion.
* Natural shaded eyebrows with slightly arched, less arched brows gives more innocence look.
* Full beautiful curl eyelashes.
* Rosy cheeks and slightly contour under the cheekbones.
* Natural moisturized rosy lips.
Products planning to use:
* Screen Face Cream Foundation Palette
* KRYOLAN Mini Concealer Palette
* Screen Face Eye Shadow Palette
* Illamasqua Loose Powder
* Illamasqua Powder Blusher in Tremble and Disobey
* Illamasqua Cream Blasher in Promise and Rude
* Benefit Bene Tint
* eylure Individual Lashes
* Illamasqua Make-up Brushes
Friday, 19 April 2013
Vampire Make-up Practice


Today I practiced my vampire make-up before the final shooting on next Wednesday. I mixed Illamasqua white foundation with my own foundation to achieved a paler complexion. (As my skin tone is quite yellowy, but if my model's skin is naturally pale then I will use the foundation colour that matches his skin colour.) After applied my foundation, I used the PVA glue technique to create the dry skin effect. Then, I used Screen Face eyeshadow palette's gray and chocolate brown eyeshadows to create the dark circle under my eyes. Finally, the funnest part, draw the veins. I used my lips colour palette's dark purple red to draw the veins first, then used purple eyeshadow to do the final touch up. It looks more realistic if I use red and purple together, as human's veins are not just one colour.
Photoshop My Eyes


Thursday, 18 April 2013
Make-up Test: Create Dry Skin Effect

I used PVA glue to create the dry, peeling skin effect. The blue circle, I used a layer of PVA glue on my skin first and wait for it to dry. Then I applied foundation and powder on top, and used a needle to poked the dried glue for creating the peeling skin effect. After this test, I used another method for the pink circle. I applied foundation first, then dab some PVA glue on top of the foundation. When the glue is dried, I then powdered the foundation and glue together.
After testing these two methods, I prefer the pink circle one more. As it looks more real and natural compare to the blue circle one.
Wednesday, 17 April 2013
Vampire Final Make-up Design

This is my final face chart for the vampire character.
* Dark Eyebrows
* Contouring under cheekbones and two sides of forehead
* Darkness around the eyes especially the under-eye areas
* Veins under-eyes
* Pale and dry matt complexion
* Pale and dry matt complexion
* Pale lips and darker in the center
Products planning to use:
* Screen Face Cream Foundation Palette
* Screen Face Cream Foundation Palette
* Illamasqua Loose Powder
* Screen Face Eye Shadow Palette
* KRYOLAN Lip Rouge Mini Palette in LC009
* Illamasqua Make-up Brushes
* PVA Glue
* Screen Face Eye Shadow Palette
* KRYOLAN Lip Rouge Mini Palette in LC009
* Illamasqua Make-up Brushes
* PVA Glue
Sunday, 14 April 2013
Design Ideas for the Babysitter
Vampire Bite

As the other character I am doing is a vampire, so I decided to do a vampire bite make-up effect on this character (The babysitter) to build up the relationship with these two characters. However, I am still thinking which stage of the bite should I create. Bite with blood running down the neck or a vampire bite scar? Perhaps with the blood will look more attractive in the pictures!
Perfect Skin

As the babysitter is still a student, which means she is quite young so her skin condition will be really beautiful and glow. I would like to create a pure and innocence feel for this character, so she will have really small amount of make-up on her face. No eyeshadows, no mascaras, but a perfect complexion.
Beautiful Long Eyelashes

For the final pictures, I would like to ask my model to close her eyes or look down, so I want the eyelashes to really stand out from the images. I think I am going to use individual false eyelashes instead of the one piece kind, as the individual false eyelashes will look more natural.
Hairstyle

A loose lower hair bun is the hairstyle that I am going for, because I think this hairstyle looks pure and elegant. I would like to create a feel of she is just randomly tied up her hair but still really pretty.
Personal Religion

As for the vampire theme, I would like to make the babysitter as a Christian. Being a Christian is the only way to make the fear go away, so she prays every night before bed.
Friday, 12 April 2013
Mood board & Storyboards
Story Moodboard

Character Storyboard - The Man Upstairs

Character Storyboard - The Babysitter

Design Ideas for Vampire
Veins Under the Eyes


After I did some researches on other versions of vampire makeup, I really like the idea of appearing veins under-eyes from The Vampire Diaries. So I am going to put this into my make-up design ideas! As in the vampire diaries, they used post-production to achieved the veins effect which I don't know how to do it, so I am going to try drawing the veins using make-up product instead. (Example picture on the right.)
Dry Complexion
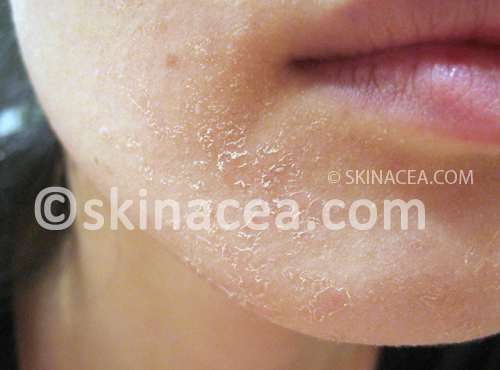
The reason of me putting dry complexion into my design ideas is that I imaging the man(vampire) upstairs is really thirsty and his skin starts to dry out because of that. Also, apart from the peeling skin, he has a matt complexion too. As vampire is supposed to be a dead creature, so they won't sweat or causing oil on their skin!
Changes of Eye Colour


Vampire's eye colour usually different from human. Now I am struggling with red eyes or no pupils, they both looks really attractive. I think I will use photoshop to change my model's eye colour, so I can try both and decide later!
Vampire Fangs
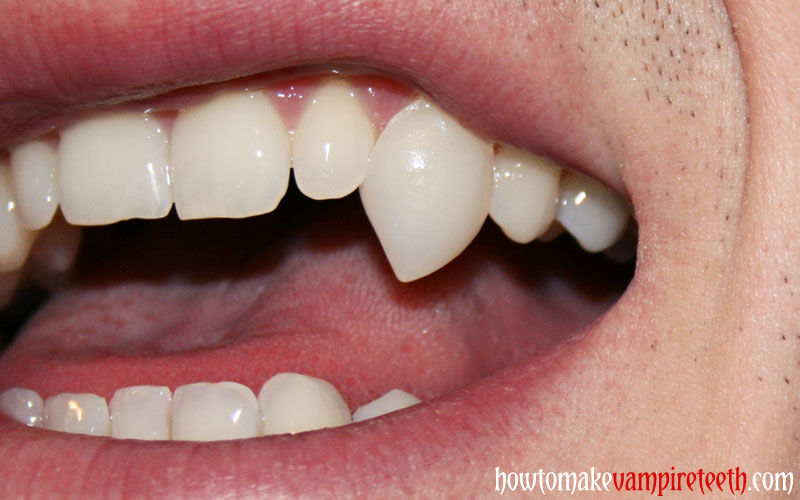
Fangs is a must have when doing vampire make-up, so of course I am going to stick fangs on my model's teeth~~~
Reference Make-up (Edward Scissorhands)


The make-up of Edward scissorhands is a perfect reference to what I am hoping to create for my vampire character's make-up. (Apart from the scars on his face, so I used photoshop to get rid of the scars.) Matt and pale complexion. Slightly contoured on the face and eyes. The colour and texture of lips are great too!
Wednesday, 10 April 2013
The Vampire Diaries
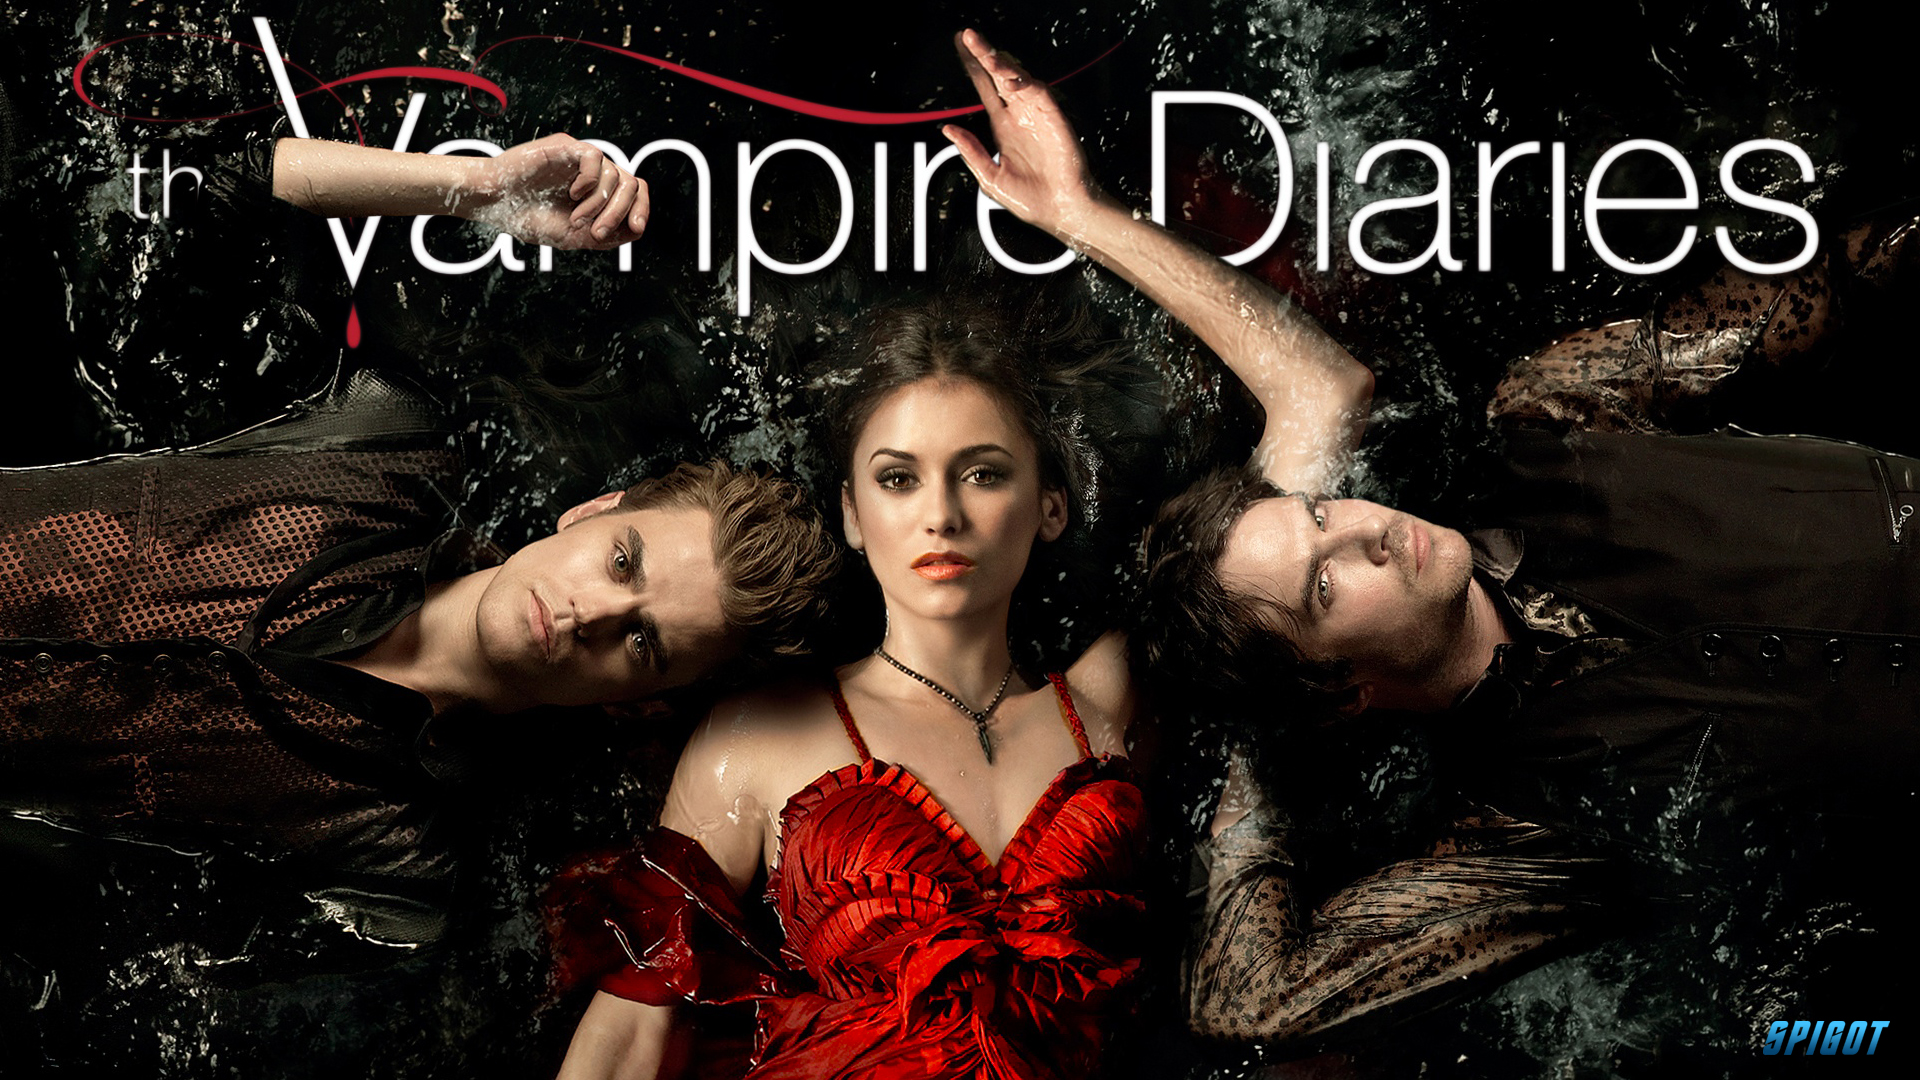
The Vampire Diaries is a supernatural drama television series developed by Kevin Williamson and Julie Plec, based on the book series of the same name written by L. J. Smith.
Vampire Make-up Analysis
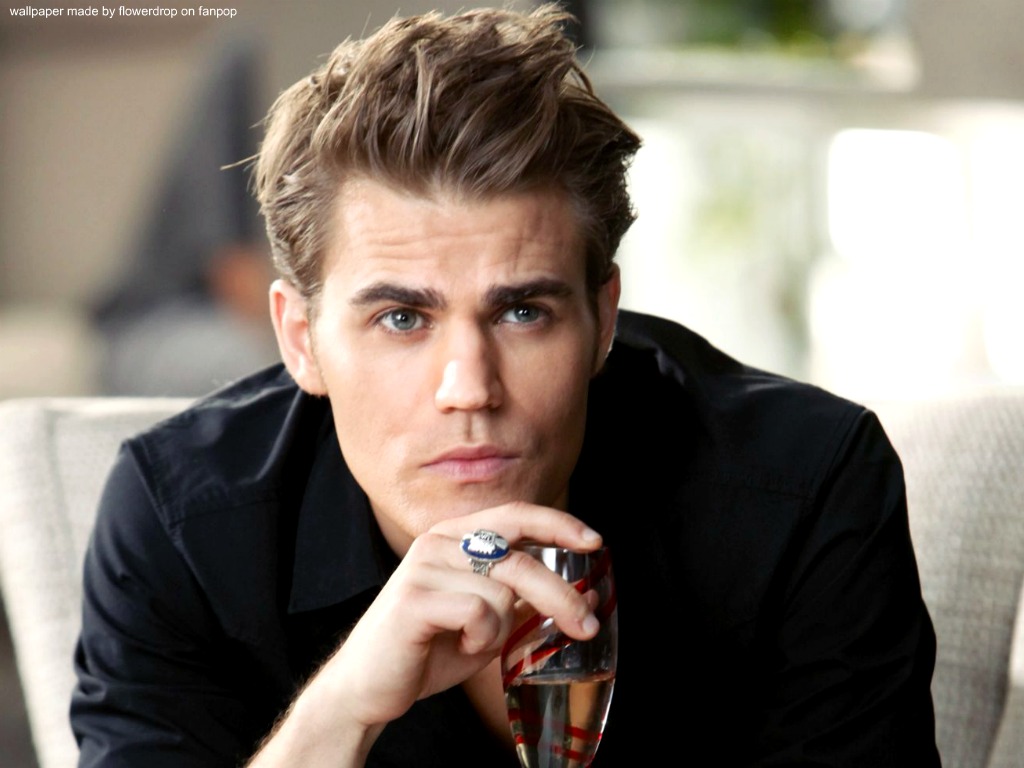

The Vampire Diaries's Vampire character look is my favorite one. In the TV series, the character has two features, human form and vampire form. When the character is in the human form, he looks no differences compare to a normal human. He doesn't have extremely pale skin like other vampires in other films/series, his eyes and lips are looking natural colour as well. The only thing which shows he is a vampire is when he is out under the sun, he must wear a ring on his finger. The ring can protect him from the sunlight, if he doesn't wear the ring, he will burn into dust. The character transforms into the vampire look when he smells/sees blood. In the vampire form, the white of the eye turned into red, veins appeared around his eyes and the fangs looks more obvious. However, the skin colour stays still like normal human.
The part when the Character changes his Appearances
Tuesday, 9 April 2013
Twilight

The Twilight Saga is a series of five romance fantasy films from Summit Entertainment based on the four Twilight series novels by the American author Stephenie Meyer.
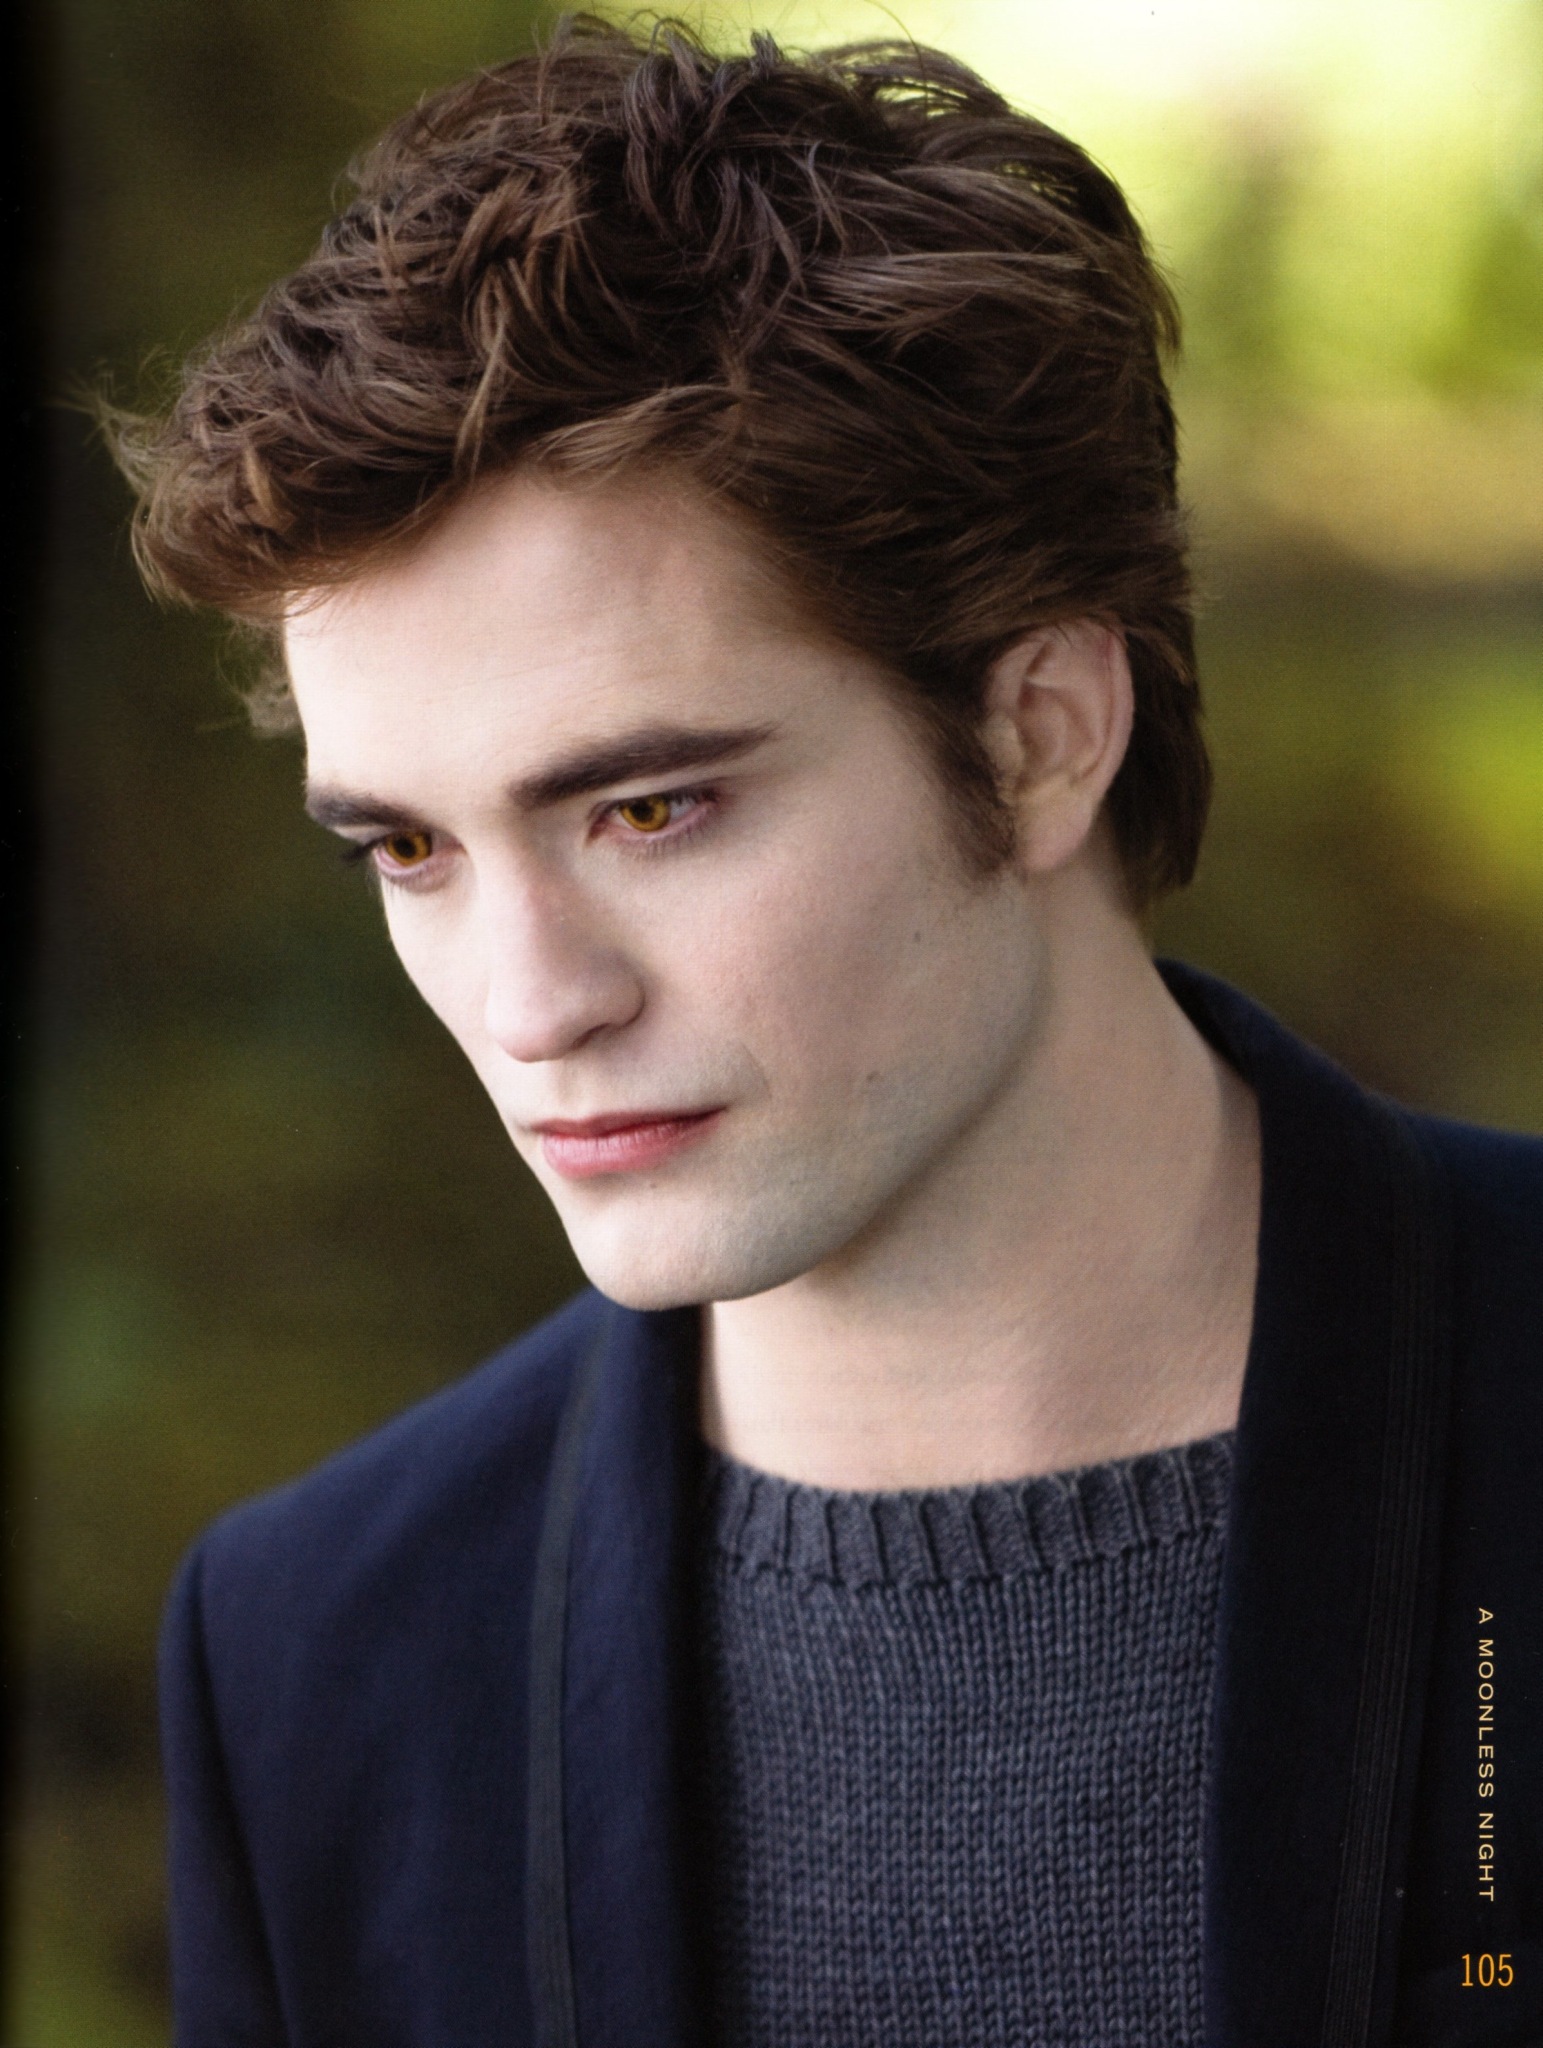


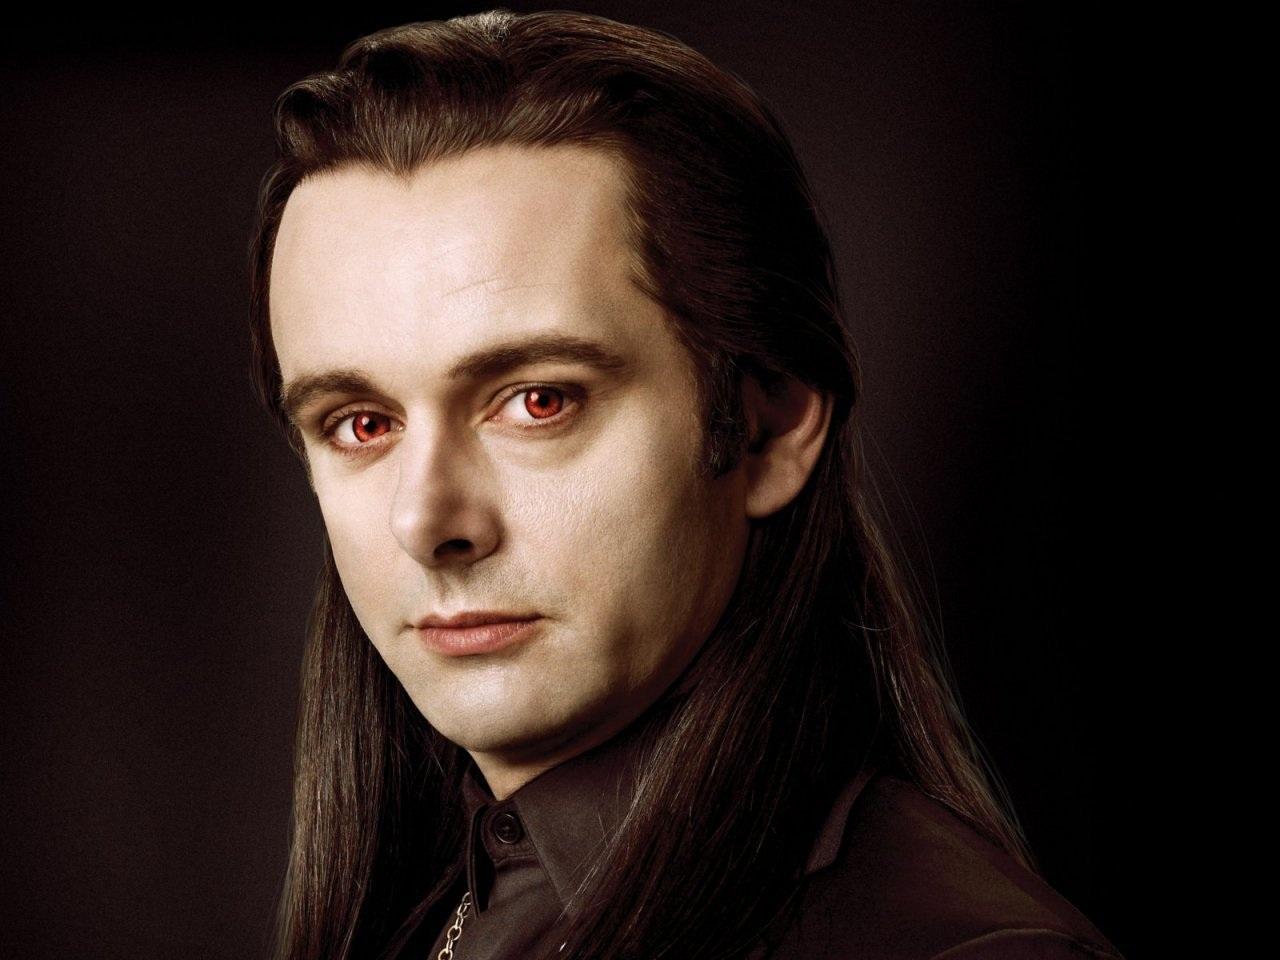
Vampire Make-up Analysis
There are two types of vampires in this film, one is drinking human blood and another type is drinking animal's blood (Let's called it the vegetarian vampire :P). The vegetarian vampires have golden yellowy eyes, but they change to black when the vampires feeling uncomfortable or haven't been fed for a long time. They also have pale complexion, rosy lips and unnoticeable fangs.
The vampires in this film are not afraid of sunlight. However, their skin shines when standing underneath the sunlight, so they only go out in cloudy days.
Those vampires that drink human blood have red eyes.
Subscribe to:
Comments (Atom)